To access hidden networks like I2P, Tor, Zeronet and others, you must first install the appropriate program. Such a program is a window into a network that is hidden to the outside observer, providing all the internal logic: cryptography, interaction with other nodes, access to the start node, and the like, which the average user does not need to know in order to save a sound sleep.
Once the network client is installed, you need to configure your browser or other software. Most often, software clients of hidden networks provide an HTTP or SOCKS proxy for the end user. These are standard protocols that are supported by all web browsers, many instant messengers and even some games. With the Hidden Network Software Client Proxy, you can route almost any application's traffic to the Hidden Network.
When traveling on the regular Internet, we don’t think about domain zones: ru, com, org, and so on, because they all open the same way. However, setting your browser to open a site on the I2P network will not open the onion domain from the Tor network. To do this, you will need to change the proxy server settings. By tinkering with the configs, you can simplify this task, but if you add the Yggdrasil network here, the topic will become much more complicated. Thus, your browser settings will invariably become more complex, thereby creating a field for potential leaks of requests from your real IP address to dubious resources. And this is provided that programs for access to all named networks must be installed on each of your devices where you want to use them.
In this article, we will look at setting up an internetwork proxy server, which needs to be configured only once and then used from any device, moving from a site on one network to a resource on another hidden network without even thinking about additional browser settings or anything else. Will be used tinyproxy - lightweight HTTP proxy server for Unix-like operating systems. To implement what is shown, any weak Debian-based server will do..
Educational program on safety
To connect to the proxy server we will use Yggdrasil - lightweight transport network with end-to-end encryption. You can think of it like a VPN. This solution is due to the fact that the traffic of hidden networks is transmitted in encrypted form only within the hidden network, and from the local software client that you install on your device to the web browser or other application, the data goes in clear text. It is normal for unencrypted data to be transmitted locally, but transmitting it over the Internet, where many people will monitor passing packets, is extremely undesirable. This is your traffic straight from the darknet.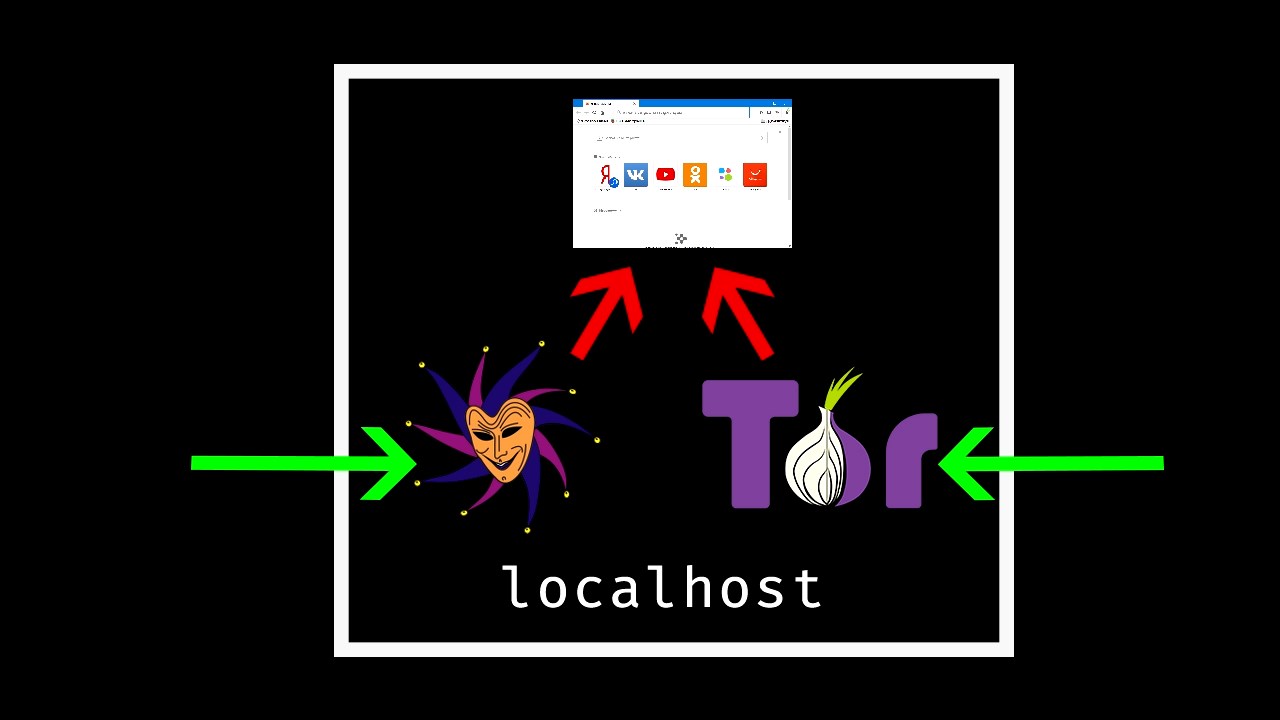
Regular websites use the HTTPS protocol, which encrypts the transmitted data. Such a solution entails additional settings and weaknesses in the form of centralized certification authorities with all that it implies, so we will do it hardcore, without trusting third parties - on the promising and lightweight Yggdrasil mesh network.
Installation and configuration
We won't waste time demonstrating the installation. Tor, I2P And Yggdrasil. Moreover, the list of hidden networks can be expanded at your discretion. You can easily find the missing background information on installation on the Internet. So, we have a fresh, weak server with installed clients of the Yggdrasil, I2P and Tor networks.
Let's go to tinyproxy git repository. Copy the link for cloning. To clone a repository to the server, you must first install git with the command apt install git (if you are not working as a superuser, add the word to the beginning of the commands sudo). 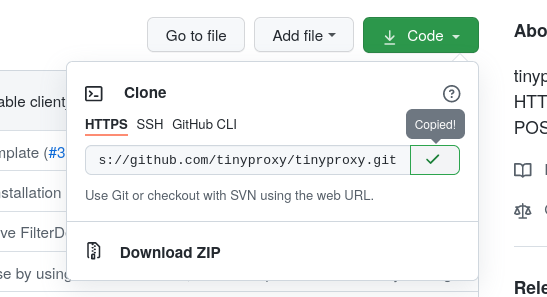
Execute the command git clone https://github.com/tinyproxy/tinyproxy.git. Instructions for compiling source codes are on the main page of the repository. 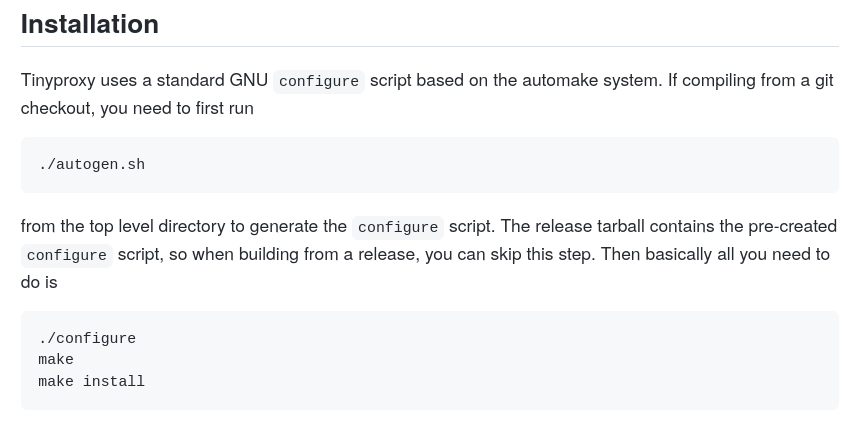
On the bare server script autogen.sh fails with error: Toolbox needs to be installed: apt install build-essential autotools-dev automake. Now autogen.sh works correctly. When building a version directly from the repository, after executing autogen.sh let's go straight to the team make, skipping a point ./configure, and then execute make install.
tinyproxy releases on GitHub are also distributed as source code and compiled in a similar way, so there is no big difference between building a release and the current state of the Git repository.
It is already possible to start a proxy server, but all the files are installed in the current directory, and the service file for systemd is completely missing. This is a significant hindrance for an inexperienced user.
The astute reader will probably be indignant: why not just install tinyproxy from the standard Debian repository, because it is there! Why not?.. Let's execute the command apt install tinyproxy. The familiar systemd service immediately appeared in the system (tinyproxy.service), and also the configuration file in /etc/tinyproxy/tinyproxy.conf.
Open the configuration file nano /etc/tinyproxy/tinyproxy.confand indicate the address to which the proxy server will accept user connections. This is done through the "Listen" parameter. Yggdrasil IPv6 address can be easily viewed through the utility ifconfig. 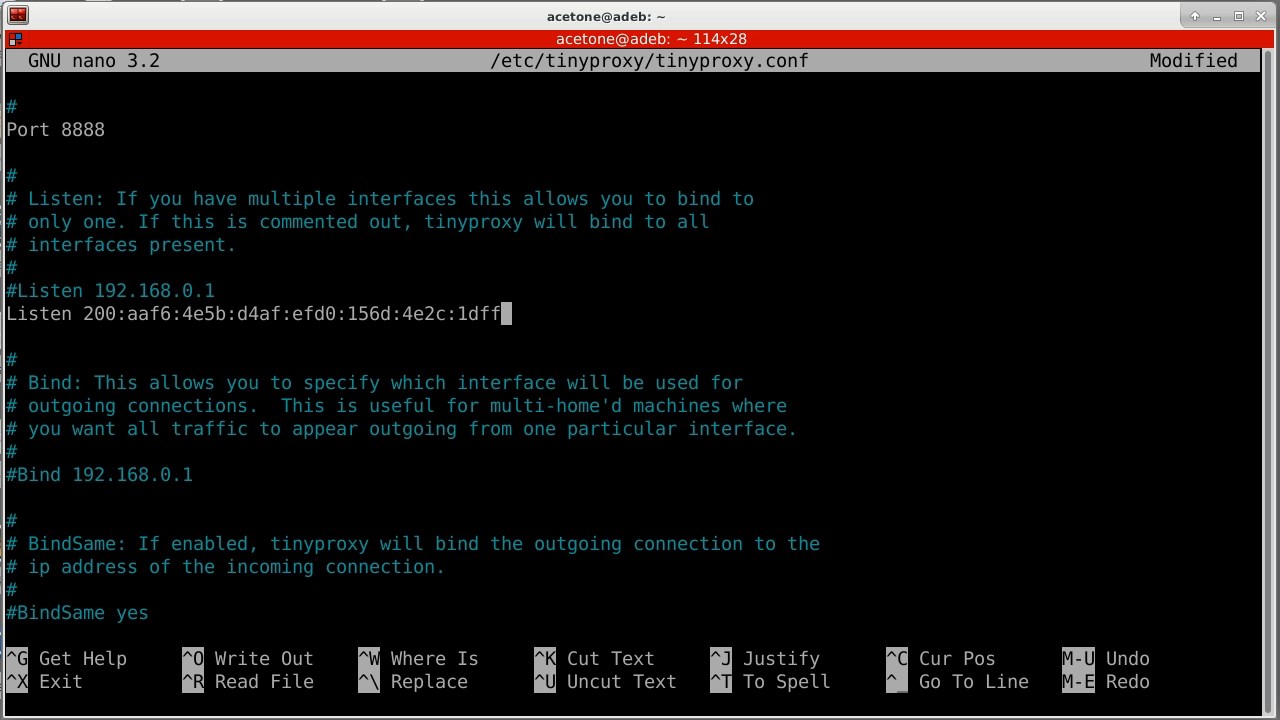
We go further down the configuration file and now the most interesting part: we indicate the upstreams, that is, the addresses of the proxy servers to which certain subnets or domains will be transferred. In our case, this is the i2pd proxy (127.0.0.1:4444) for ".i2p" and Tor domains (127.0.0.1:9050) - for ".onion" domains. For i2pd, I recommend specifying an http proxy, since this mode of operation is more convenient for managing the address book and adding new short i2p addresses directly through the browser. It is also possible to specify the "upstream none" parameter, which is responsible for direct connection of the proxy server to specific addresses and domains, regardless of other rules. 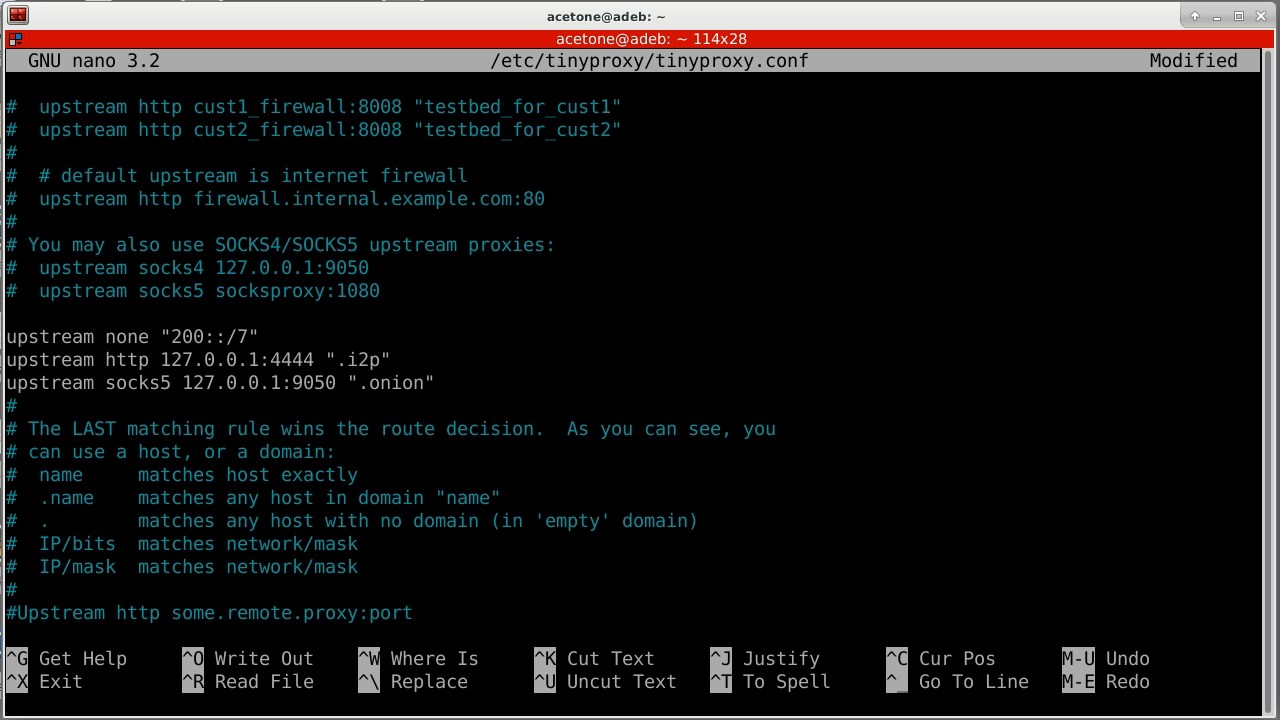
upstream none "200::/7" # Подсеть Yggdrasil Network
upstream http 127.0.0.1:4444 ".i2p"
upstream socks5 127.0.0.1:9050 ".onion"
We go lower in the file and comment out the “Allow” line with the local address, since we will not be connecting from the local machine. If there is no "Allow" value in the configuration file, tinyproxy accepts connections from any addresses. 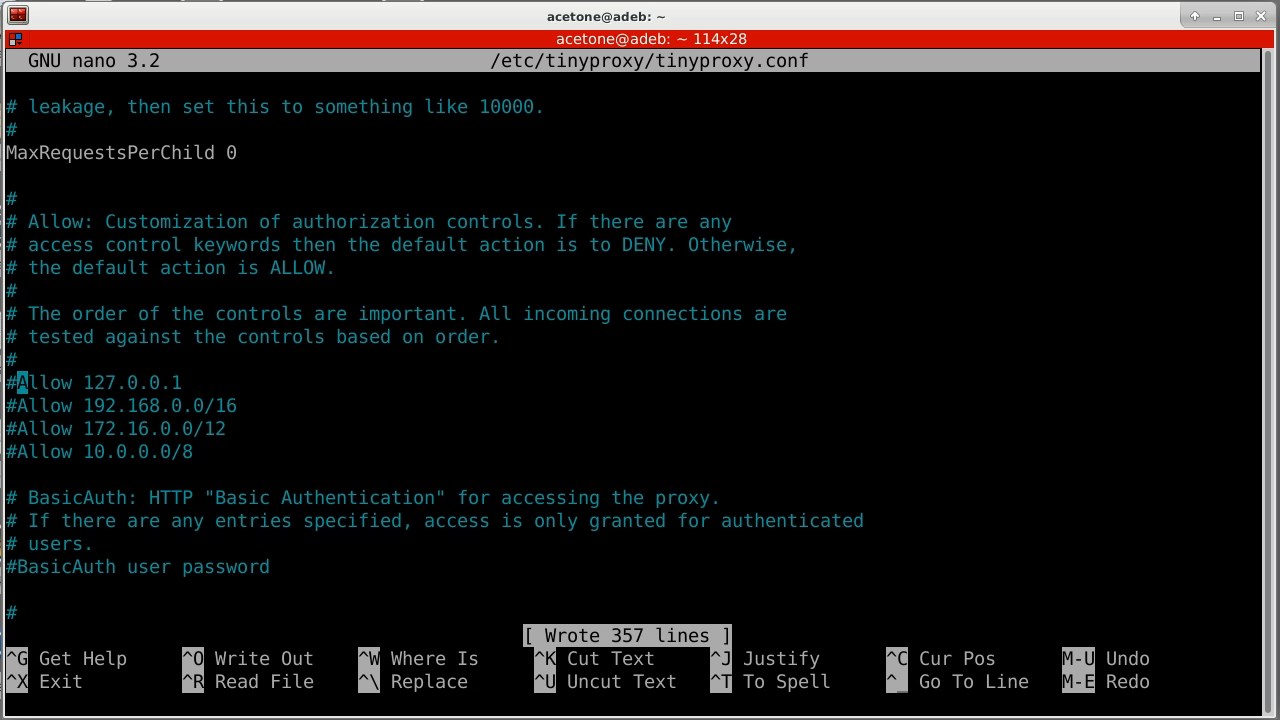
For comfortable use, you need to comment out all the “ConnectPort” parameters, since there is no need to limit yourself and our users when connecting to non-standard ports. 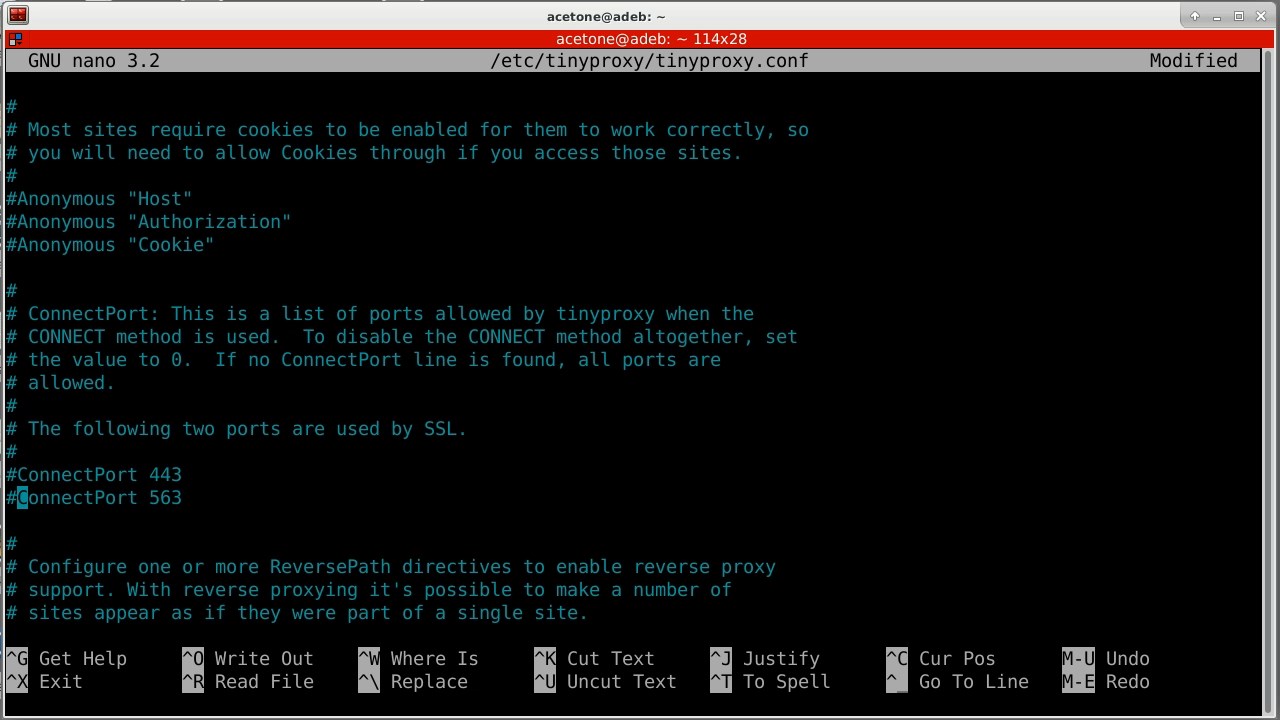
Save the changes and restart tinyproxy:
Ctrl + S - Save Changes
Ctrl + X - Exit the editor
systemctl restart tinyproxy - Restart tinyproxy
I set an HTTP proxy in the browser settings. Naturally, Yggdrasil must be installed on the host machine. The default port is 8888. Everything seems to be working correctly: checking the IP address showed the address of the server on which tinyproxy was just installed. 
I open the proxy server configuration file again and delete the ".onion" domain from the Tor network proxy: upstream socks5 127.0.0.1:9050. This kind of line means that all connections except Yggdrasil (marked as upstream none) and ".i2p" should be routed to Tor. By restarting tinyproxy, you can check the behavior through the browser.
As of 2021, this configuration will not work when installing the old version: access to the Internet still occurs from the server’s IP address. If you remove the Yggdrasil subnet and try again, tinyproxy will finally start working correctly.
Let's return to the topic of using the current version of the software, and not outdated packages from the repositories of my favorite distribution. Starting with version 1.12, tinyproxy will work correctly with IPv6 subnet designations, however, at the time of writing, the latest release is 1.11. It does not know how to correctly perceive IPv6 subnets. There is no need to talk about an older package from the Debian repository.
Let's replace the outdated tinyproxy binary with the new one that we compiled a few minutes ago:
rm /usr/bin/tinyproxy
cp ./src/tinyproxy /usr/bin/
It would seem that everything is fine, but now the service constantly freezes when starting. Let's try to figure out the reason. If you explicitly pass the configuration file to the executable file, we will see the line numbers that tinyproxy complains about. 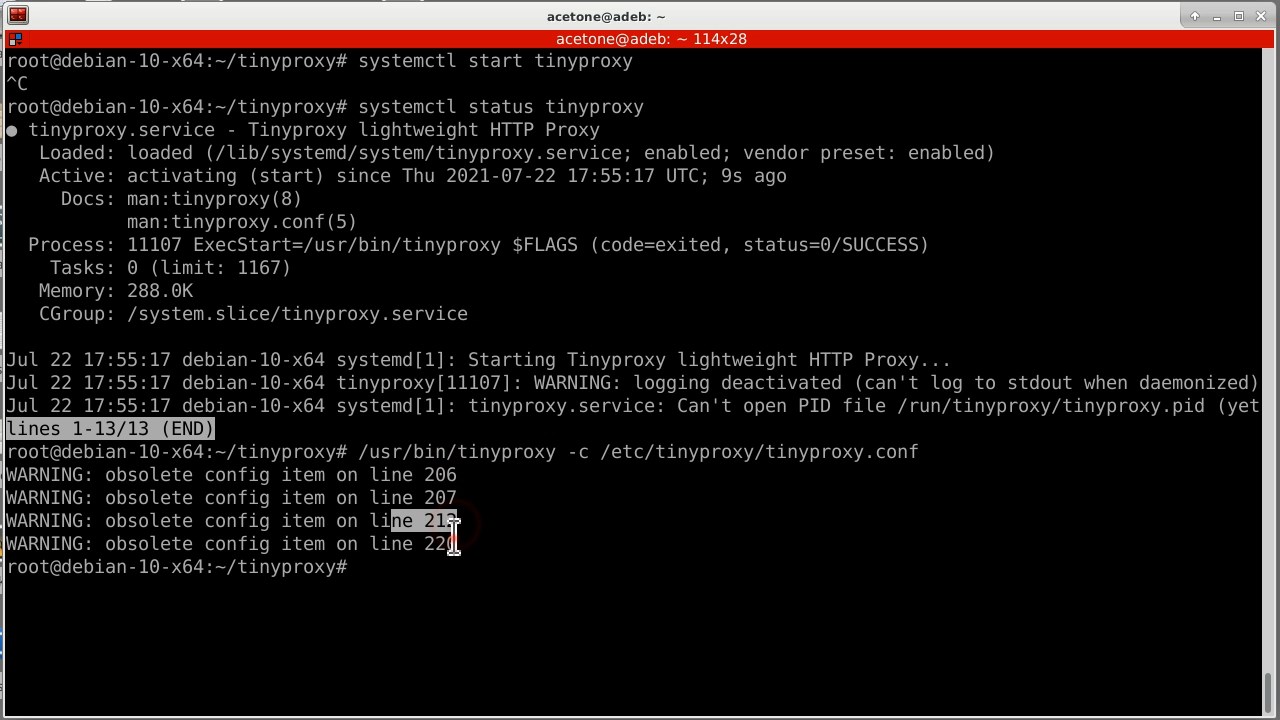
Opening the configuration file through the editor nano with a flag -l, so that line numbers are displayed, and I comment on problematic lines. These are outdated parameters that the new version of the program does not want to accept. The reason for the freeze is doubtful, but still. 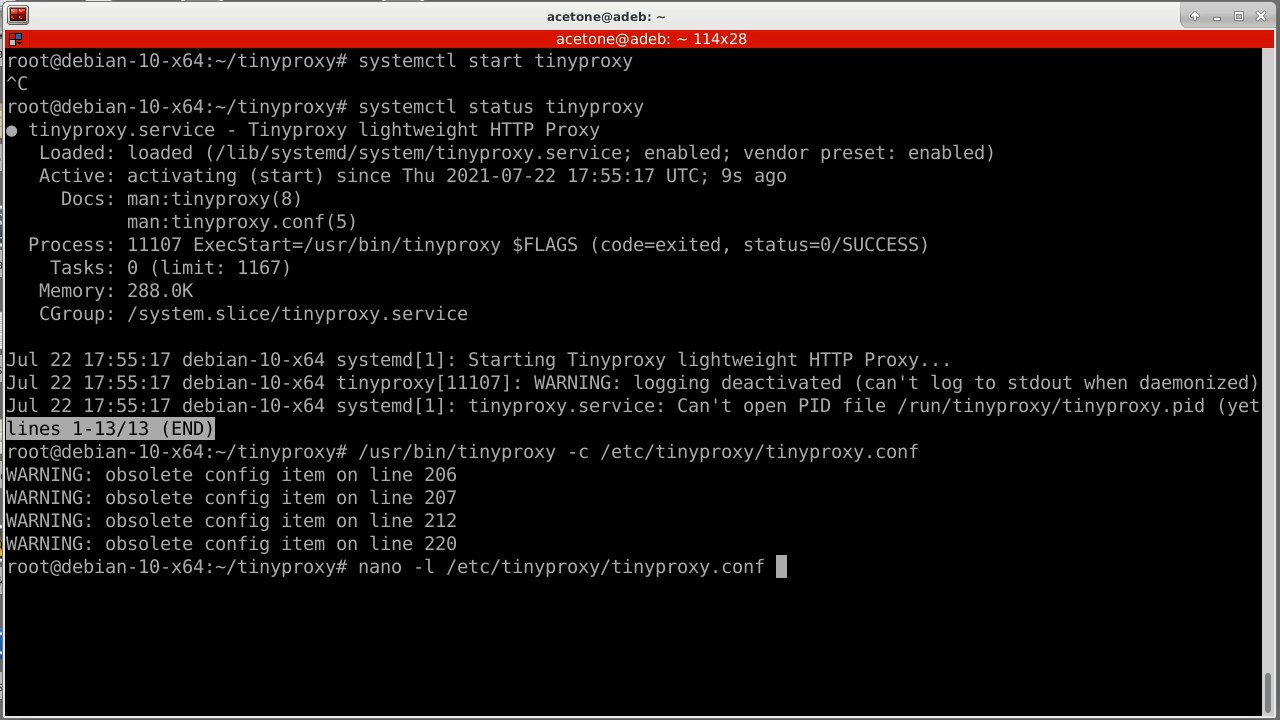
If we try to run tinyproxy, we will see a freeze again. Opening the systemd service file nano /lib/systemd/system/tinyproxy.service and I simplify the launch algorithm a little. Perhaps this is not the most orthodox solution, but if only it would work: I comment out the “EnvironmentFile” parameter and change the “ExecStart” line, explicitly indicating the path to the configuration file. 
You need to run the command systemctl daemon-reload, for changes in the service file to take effect. The updated tinyproxy has started.
By the way, tinyproxy has a monitoring web page available by default at http://tinyproxy.stats. Naturally, this page can only be opened through the proxy server itself.. 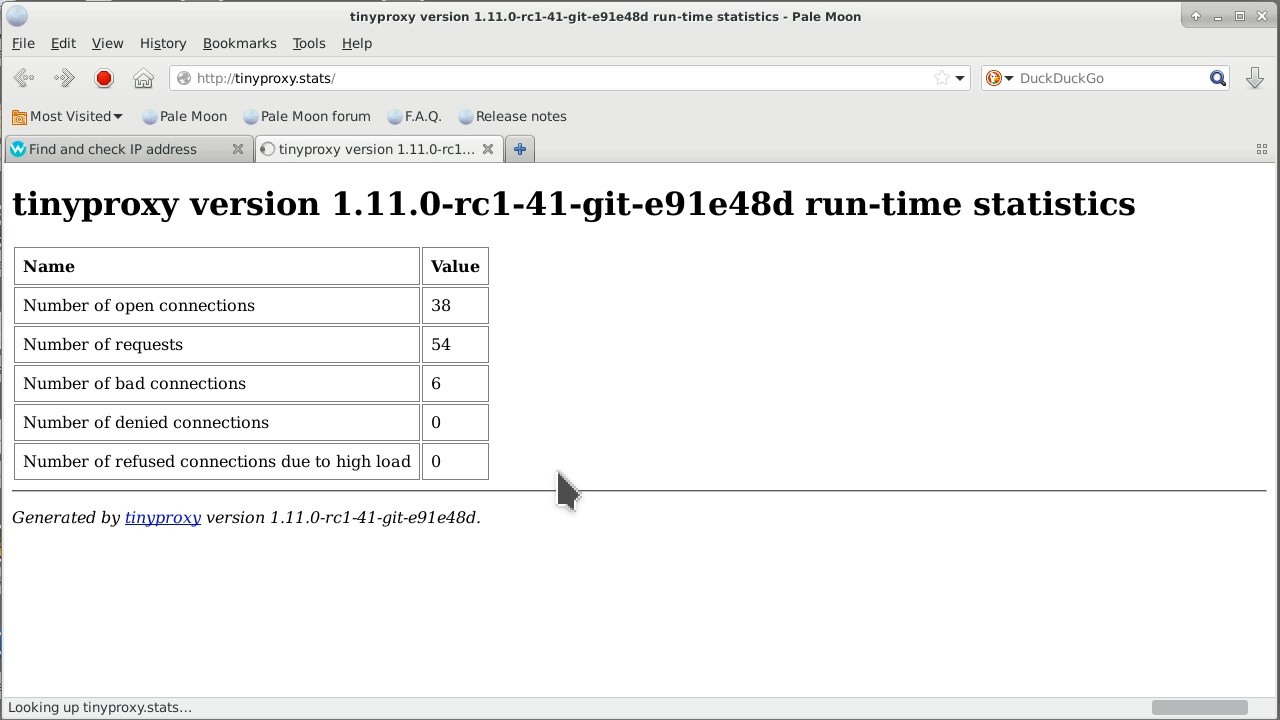
Checking the Yggdrasil address also shows that we are not visiting from our own address, but from the address of the server where tinyproxy is installed. Changing the Yggdrasil address through our proxy now also works. Moreover, you can open any domain from the I2P or Tor networks. 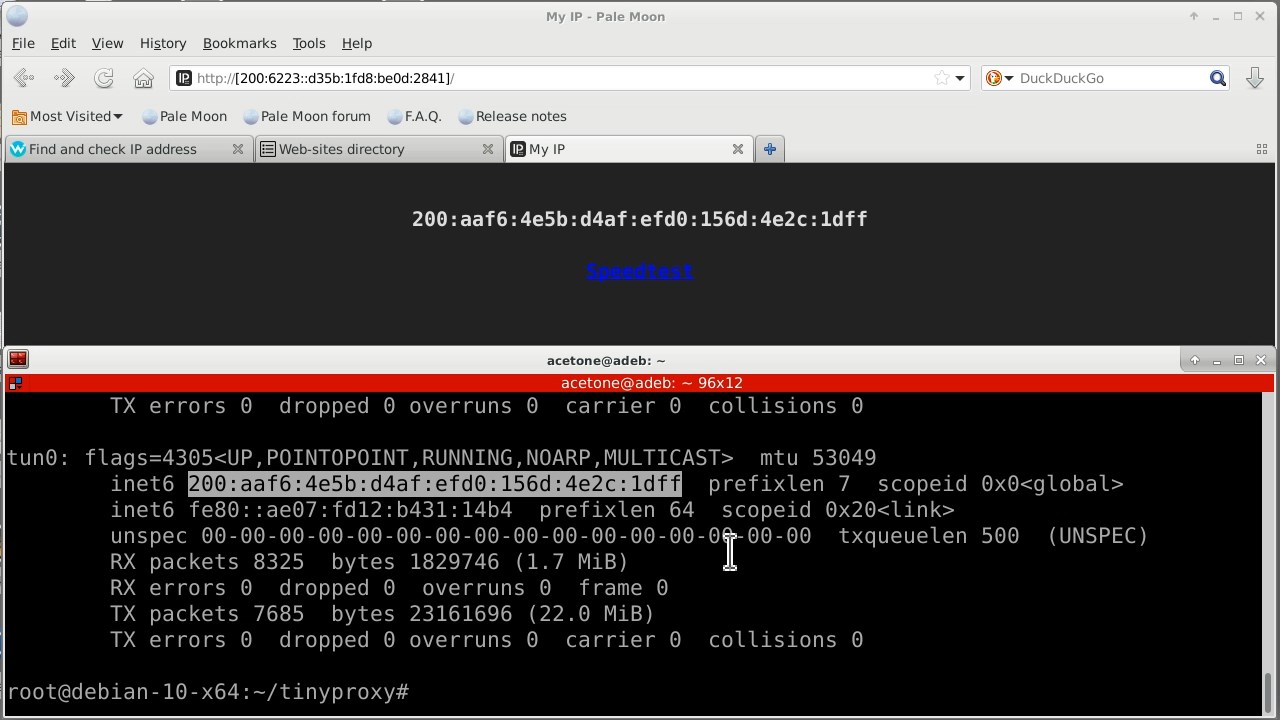
If you don't need access to an IPv6 network through a proxy server, you can essentially use just the legacy package from your operating system's repository without any additional hassle. Also, someone might consider it a lifehack to pre-install a full-fledged package so that the tinyproxy service file is created, and then update the service file, as was done in the example above. Your server is yours to decide how you will administer it.
At this point, the configuration of the multi-network proxy server can be considered complete. Similar to what is shown, you can add any upstreams for other hidden networks or individual domains and use a single proxy server on all your devices for any applications, without bothering yourself with installing additional software on each device (except Yggdrasil).
The tutorial is deliberately somewhat lengthy to demonstrate a solution to the problem with launching after updating the binary file. I think this will help develop the ingenuity of young administrators.
The article is a text version video.